Need a passport sized photo but find that the price of it is just too high?
I recently needed a passport-sized photo and wanted to do it the quickest, easiest, and cheapest way.
While there are many pop-up photo booths scattered across town, each charges a minimum of $7 which I deem too costly for a single passport size photo!
Here are the steps to get your passport photo printed cheap, and of decent quality (of course).
- Download the Photo for Passport mobile application
- Dress up and get ready to take your photo. Ensure that your eyes and eyebrows are not blocked by your hair. If you have dark coloured hair, you may want to put on a lighter coloured shirt to ensure that your hair does not blend in too much with your shirt (or vice versa)
- Search for a white/light grey (depending on the requirement) background around your house or neighbourhood. Ideally, lighting should be ample – natural lighting is best
- Launch the mobile application you download in Step 1
- Select “New Photo” and choose the country to which the photo will be used. The recommended sizing and requirements will be shown for easy selection.


- Once selected, you will be prompted to “take a new photo” or “select an image from the gallery”

- If you select “take a new photo”, follow the guidelines on the camera for easy reference.

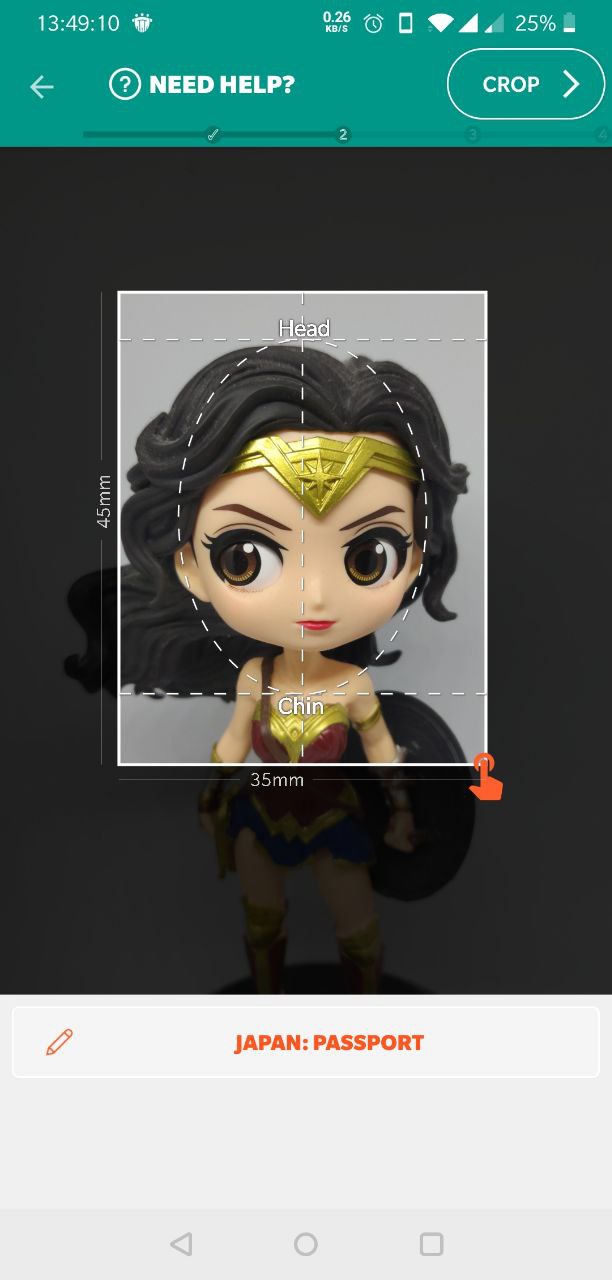
- Once photo is taken, you can proceed to edit it to the actual size. You will be prompted to upgrade to the premium option, but if you’re not too particular, you can just select “continue with ads”

- You can then edit your photo by scaling the size of the rectangle around the face. A guideline will be shown on where the top of the head and chin should be within the photo. Once satisfied, select “Crop”.

- The application will then alert you if the photo size and background colour is okay. For this example, the background colour wasn’t accurate, and if I select “change”, I’d be prompted to upgrade to get the background eraser option. However, as this is just an example, I did not bother too much and proceeded to “Save”.

- You can then proceed to save your image, and you will have the option of saving the photo as multiple copies on a single 4R (or whatever size your print is).

- You can then save the image and proceed to a photo printing shop to print this single image. Most photo shops allow you to print images directly from photo printing stations. Even the most costly form would be $2 per photo print. $2 for 6 photos vs $7 for 4 photos? You choose!
There are other alternatives online, but this was the quickest, most straight-forward, and free way of getting my passport photo printed.
Hope these tips will help you as you take your passport-sized photos!